It’s day 4, the last day of Chocolate Boot Camp. (Most Chocolate Academy courses are three days long, but this is a four-day course, because there’s so much material to cover. Click here to read the report on Day 1 and Days 2 and 3.)
Today we need to finish everything, and there’s a lot to finish!
But first we have to make the chocolate marshmallow.
Marshmallow is made from sugar syrup, egg whites and gelatin, and it has a lot in common with meringue. The egg whites need to be at room temperature (or perhaps slightly above) to develop full volume, and any fat will keep the egg whites from whipping properly.
Alert readers should be saying, “Hey, wait a minute! Isn’t there fat in chocolate?” Yes, there is, and when we get around to adding the chocolate it is going to deflate the marshmallow somewhat. (I think the Easter candy makers get around that by adding air as they fill their chocolates with marshmallow, but as with many foods, what happens in a small batch operation, like your friendly neighborhood chocolatier or home kitchen, and what happens in mass production facilities often have little in common.)
When I have made marshmallow, I generally used the recipe in the Pope New Candy Cookbook. (Long out of print, but considered a classic, I’ve seen copies selling for several hundred dollars, but you can often find it for a lot less online! The Francois and Antoinette Pope cooking school was in Chicago from 1930 until it closed in 1971. See Chicago Tribune story.)
The Pope recipe has you add the hot sugar syrup slowly to the egg whites, then add the bloomed gelatin.
That’s not how Chef Russ does it, though. (Does that seem like a recurring theme in this series?) He adds the bloomed gelatin to the hot sugar syrup, then pours that over the partially whipped egg whites. After the marshmallow is blended, the chocolate is warmed and stirred into the marshmallow, which, as expected, mostly deflates the whipped egg whites.
As he’s scraping the bowl with some ingredient in it, Chef says that one of the chefs he worked for called this ‘Cadillacing’ the bowl. He says, “If you do this for your entire cooking career, you’ll have saved enough to buy a Cadillac.”
The chocolate marshmallow is piped into larger hemispherical shells that were made earlier.
We’re going to cover these with a chablon, a thin layer of chocolate cut with a round cutter to fit in the shell. This will make them easier to deal with when we dip them.
There are a number of candies we made that I’m not going to discuss, but I do want to talk about the almond rocher. Caramelized almond slivers are mixed with milk chocolate, shaped, drizzled with a little dark chocolate, and lightly dusted with a non-melting sugar. This is probably the first of the candies we made in class that I’m going to make at home, they were incredible. I’ve made almond toffee candies (similar to Almond Roca), this is completely different.
This is also a good time to talk about one of the more counter-intutive things about working with chocolate. The more fat (cocoa butter) you have in chocolate, the easier it will be to work with while warm, because warm fat is very fluid. But remember that cocoa butter is a solid at room temperature, so when the chocolate cools, the more cocoa butter in it, the harder the finished chocolate will be. So the chocolate you choose to use can make a big difference in the products you make.
This may explain a lot of the mixed results I’ve had making candies with chocolate in them over the years. I know I’ll be a lot more careful in choosing what kind of chocolate I buy from now on.
When you buy a (dark) chocolate bar at the store, it will often proudly say how much cacao content it has. What it generally won’t say is how much of that cacao content is cocoa solids and how much of it is cocoa butter. That’s a major difference between buying retail chocolate and buying chocolate intended for confectionery use, the better manufacturers (including, ahem, Callebaut and Cacao Barry) will clearly label their products to show how much cocoa butter and how much cocoa solids they contain. Barry Callebaut products also use a one-to-five drop scale to indicate how solid the chocolate will be, which is easier than doing the math.
One of the candies we made was a lemon ganache in yellow eggs with white speckles on them. When we sampled the left-over ganache, we finished this one, it reminds me of a lemon curd.
Chef Russ and his intern/assistant, Terri, work together to put the wings on the bats before they are spray painted.
Chef says that if he was trying to make these by himself, he’d either change the design to make them easier to assemble or he’d have them laying on the table for attaching the wings. I’m going to try a variant on that to see if I can repair the one I brought home that broke.
Here are the assembled and painted bats:
These are simple display pieces, but there are several examples of more complicated pieces from a recent course on making showpieces on display in the Chocolate Academy dining area:
Lunch at the Chocolate Academy was pretty good every day. The meals were catered in, but I think the desserts were made by the pastry chefs on staff. Here’s a shot of the desserts we had today:
Some days the desserts were so pretty it was a shame to have to cut them.
With lunch over, we’re into the final push to assemble everything. All the chocolates that we have piped have to be closed. Most are finished by piping a layer of chocolate on them, that will become the bottom. Some of them get covered with a thin acetate sheet to make for a smooth finish, others get a transfer sheet put on them. These are displayed with the smooth or printed side up. The transfer sheets have cocoa butter with designs or messages on them, some have the Callebaut logo on them, for example.
The marshmallows are dipped, and we all get a tray of cut ganache pieces to dip. My skill on this hasn’t improved since Monday, lots of them still fall off. In an hour, I’m able to make 29 of them, probably half of which fell off the fork, but some of my fellow students only made a few more than I did, so I don’t feel too bad. But I’m never going to become a chocolatier millionaire at this rate!
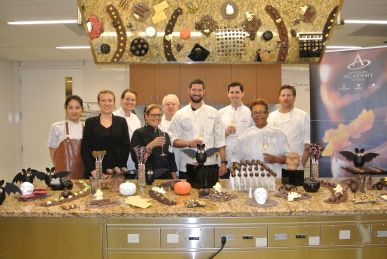
While we’re dipping chocolates, Chef Russ and Terri are busy putting together the buffet table, with the molded pieces he’s made over then last several days plus samples of all our wares, including a few of my admittedly poorly-dipped chocolates.
You can’t see it very well, but I think that’s my spider hiding under the display board in the above photo. I made the legs too thin and they wouldn’t attach right. I brought my spider home, but the legs broke off. I may try to make some new legs for it, but I think I can make a more realistic spider by varying the technique a bit, that may be something I practice after my chocolate tempering pot arrives.
I brought this pumpkin candy dish home, and it’s on my wife’s desk at work now. It’s so shiny people don’t think it’s completely made of chocolate!
We had a good class, and I enjoyed working with my classmates and the Chocolate Academy staff:

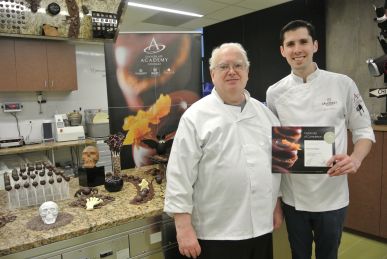
And to finish things off, here’s a shot of me getting my certificate from Chef Russ Thayer:


Home › Forums › My Week At Chocolate Boot Camp — Day 4
Tagged: chocolate academy tempering molding finishing